
Using AWS EC2 templates and deployed a Nginx web server using Autoscaling and Elastic LoadBalancer.
Author: Siddharth Gupta
Create AWS EC2 instance.
Search on google “https://aws.amazon.com/” and open AWS console.
Click on ‘Sign In to the Console’

AWS login console will open as shown, Enter id and password to login.
Now you will get AWS dashboard.

Search on AWS console EC2 (Virtual server in the cloud) and click it.

Click on instances


1.Create a EC2 Instance.
Click on launch instance.

Enter the Name

Select OS ubuntu

Select Instance type-t2.micro

Create new key pair and create your own. In my case I have existed Key pair : Linux-for-devops

Create security group and allow SSH, HTTP and HTTPS.

Click the launch instance.

EC2 instance created.

Click on Connect button.


Create a simple webpage using Nginx.
sudo apt-get update

sudo apt-get install nginx -y

cd /var/www/html

sudo vim index.html
I have mentioned a simple webpage code in index.html file and save it —->:wq
<h1>This is my first webpage in web Nginx</h1>

Restart the nginx web server.
sudo systemctl restart nginx
Copy the EC2 instance public IP and use port 80 in web-browser. Check the webpage is working or not.

Paste your Public IP in web-browser along with port : 52.14.119.85:80
Webpage is running

2. Template Creation
Select the EC2 instance.

Click on Action >Image and template >Create template from instance.

Launch template name – required–My-first-template
Template version description—-V1
Other things are already filled because you are creating a template of already existed EC2 instance.

My first template created


Now select the EC2 instance and terminate it.


Instance Terminated
Now the code, commands and webpage are deleted because the instance is terminated.
Click on launch templates

Go to the Actions and Modify template (Create a new version)

Template version description– V2
Scroll down and click on advance details

Scroll down and see User data (optional)

Write Shell scripts in user data
#!/bin/bash

sudo apt-get update -y

sudo apt-get install nginx -y

sudo su -

echo "My First Webpage, Server IP address is $(hostname -f)" > /var/www/html/index.html

systemctl enable nginx

systemctl stop nginx

systemctl start nginx
Click on create template version

Modified version created

Click on actions and launch instance from template

select version of template—V8 and Launch template

New EC2 instance created

Webpage is open

Autoscaling and Loadbalancer
Autoscaling and load balancing are essential components of building scalable and highly available applications on AWS.
- Autoscaling: Autoscaling automatically adjusts the number of compute resources (such as EC2 instances) based on the load or traffic your application is experiencing. This helps ensure that your application always has enough resources to handle incoming requests without over-provisioning and wasting resources during periods of low traffic. AWS provides a service called Auto Scaling, which allows you to define scaling policies based on metrics like CPU utilization, network traffic, or custom metrics. When certain thresholds are reached, Auto Scaling can automatically launch additional instances or terminate existing ones.
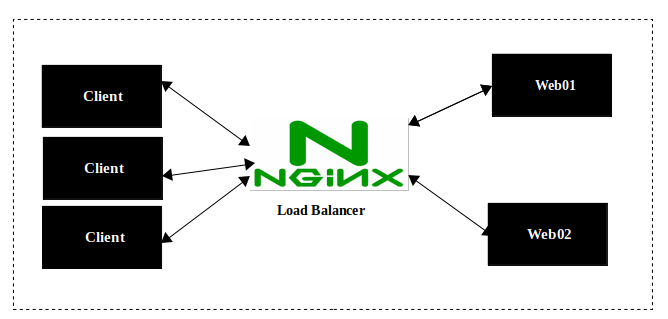
- Load Balancer: Load balancing distributes incoming application traffic across multiple targets, such as EC2 instances, containers, or IP addresses, to ensure that no single resource becomes overwhelmed. AWS offers several load balancing options:
- Classic Load Balancer (CLB): This is the traditional AWS load balancer that routes traffic based on either the application’s request data (Layer 7) or network connection information (Layer 4). CLBs are mainly used for applications that were built within the traditional EC2-Classic network.
- Application Load Balancer (ALB): ALB operates at the application layer (Layer 7) and allows you to route traffic based on content. ALB is ideal for modern web architectures, including microservices and container-based applications.
- Network Load Balancer (NLB): NLB operates at the transport layer (Layer 4) and is capable of handling millions of requests per second while maintaining ultra-low latencies. It is ideal for TCP and UDP traffic that requires high performance, low latency, and static IP addresses.
By combining auto-scaling with a load balancer, you can create a highly scalable and fault-tolerant architecture. Auto scaling ensures that your application can handle varying levels of traffic, while the load balancer distributes that traffic across multiple instances to prevent any single point of failure and optimize performance.
A. Click on Auto Scaling and create Auto Scaling Group.

Auto Scaling group name

Select Launch template Name
My-First-template
Version-8

Click on Next

Select availability Zones and Subnets then click on Next.
us-east-2a
us-east-2b
us-east-2c

Select attach to a new load balancer

Load balancer type
Select application load balancer.
Load balancer scheme
Select Internet facing

Create a target group

Enabled the health checks

Additional settings
Enabled monitoring and Enable default instance warmup then click on next

Desired Capicity-1
Min desired capacity-1
Max desired capacity-5

Click on Automatic Scaling
Select target tracking scaling policy

Clicked in Create auto scaling group

Auto Scaling groups =AWS-Hero-to-Zero auto scaling created

AWS-hero-to-Zero Ec2 instance created Automatic

Go to loadbalancer AWS-hero-to-Zero-1 loadbalancer showing

Go to load balancer and click on security group, Click on security group id

Click on edit inbound rules and add port 80 then save the rules.


Click on AWS-Hero-to-Zero Server and Copy the DNS Name.

Paste it on Web-browser url and check.
Loadbalancer URl working
http://aws-hero-to-zero-1-1725057675.us-east-2.elb.amazonaws.com/

WAF (Web application firewall)
Go to search WAF and click it

Create web ACL

Select region US East (ohio) and Name- Mera-Instance

click on add aws resources

Click on application load balancer and your load balancer show aws-hero-to-zero-1

click on next

Click on add rules and add managed rules groups

Click on AWS managed rules groups and add bot (Add to web ACL) then edit it


Bot control inspection level —Select Common

Scope of inspection—Select Inspect all web requests

Save the rule.


Set rules and priority


Review and create web ACL

Web ACL created

When traffic goes high automatically VM created


When traffic goes down automatically VM terminated


Happy Learning 🙂
Thank you for reading this Blog. Hope you learned something new today! If you found this blog helpful, please like, share, and follow me for more blog posts like this in the future😊😊.
Author: Siddharth Gupta